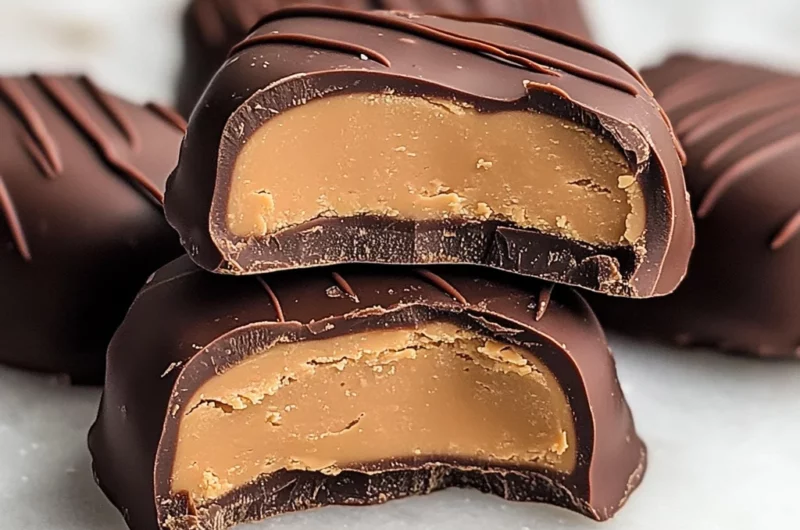
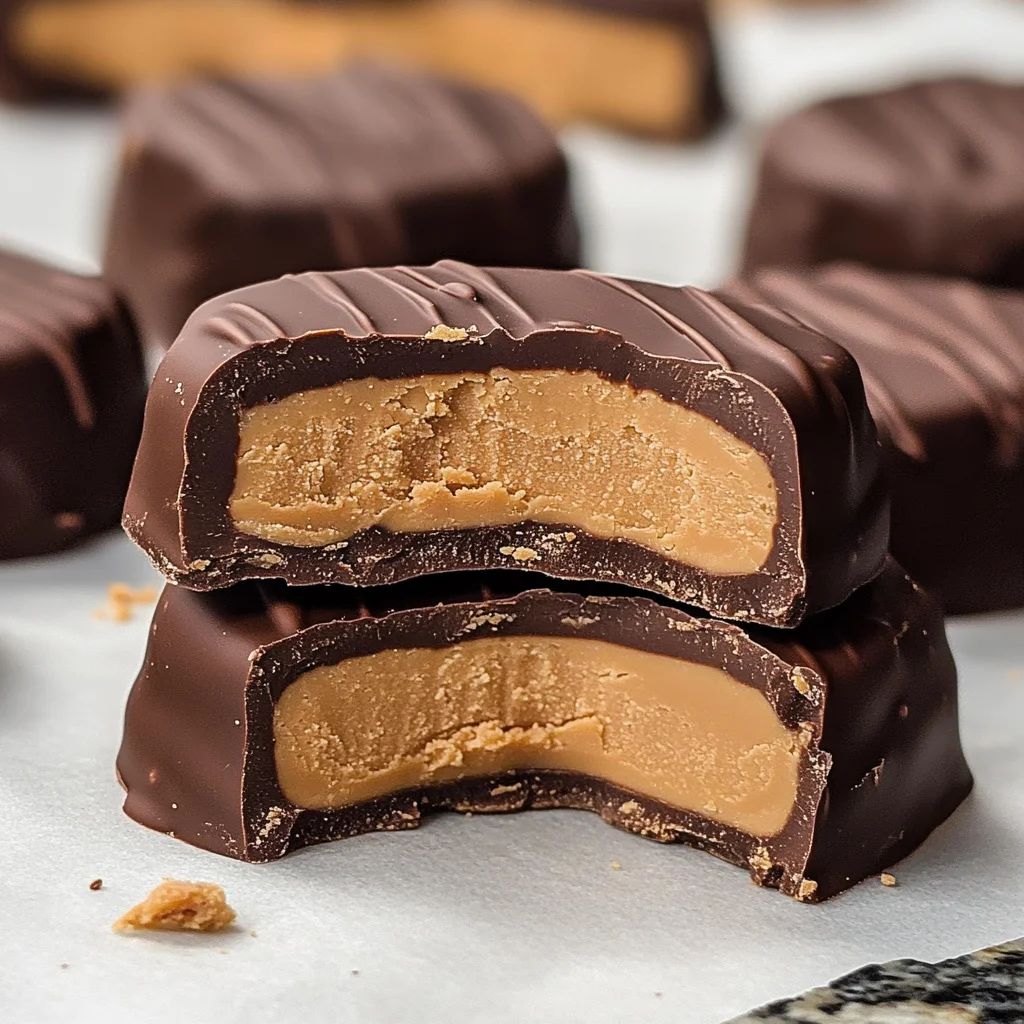
A smooth peanut butter filling coated in milk chocolate makes these Peanut Butter Chocolate Eggs (and Bunnies) irresistible. Perfect for holidays, parties, or just a sweet treat at home, these delightful candies offer a nostalgic flavor reminiscent of your favorite childhood snacks. Their unique shape adds a fun twist, making them suitable for various occasions, from Easter celebrations to everyday indulgences.
Why You’ll Love This Recipe
- Irresistible Flavor: The combination of creamy peanut butter and rich chocolate creates a mouthwatering treat that everyone loves.
- Easy to Make: With simple ingredients and straightforward steps, this recipe is accessible for bakers of all skill levels.
- Customizable Shapes: Use different cookie cutters to create bunnies, eggs, or any fun shape you desire.
- Perfect for Sharing: These treats are great for gifting or sharing at gatherings; everyone will want to enjoy them!
- Family-Friendly Fun: Involve kids in the process of cutting and decorating these delightful shapes for quality family time.
Tools and Preparation
Before you start making your delicious Peanut Butter Chocolate Eggs (and Bunnies), gather your tools. Having everything ready will make the process smoother and more enjoyable.
Essential Tools and Equipment
- Mixing bowls
- Hand or standing mixer
- Jelly roll pan (or half sheet pan)
- Parchment paper
- Cookie cutters (bunny and egg shapes)
- Heatproof bowl
- Piping bag or small ziploc bag
Importance of Each Tool
- Mixing bowls: Essential for combining ingredients effectively without making a mess.
- Hand or standing mixer: Saves time and ensures a smooth mixture, which is key for the perfect filling texture.
- Cookie cutters: Allows you to create fun shapes that enhance the visual appeal of your treats.
Ingredients
A smooth peanut butter filling coated in milk chocolate is just like the Reese’s treats we’ve all come to know and love.
Ingredients:
– 1/2 cup salted butter (melted and cooled)
– 2 cups creamy peanut butter
– 1/4 cup granulated sugar
– 1 tablespoon vanilla extract
– 4 cups powdered sugar
– 3 cups milk or white chocolate chips (or a combination of both (2 bags total))
– 2 tablespoons shortening
– 1/2 cup dark or semi-sweet chocolate chips
– 1 teaspoon shortening
How to Make Peanut Butter Chocolate Eggs (and Bunnies)
Step 1: Prepare the Pan
Line a jelly roll (or half sheet pan) with parchment paper. This will prevent sticking and make it easy to lift out the peanut butter mixture later.
Step 2: Mix the Filling
Using a hand or standing mixer, beat together cooled melted butter, peanut butter, granulated sugar, and vanilla until smooth and creamy.
Step 3: Add Powdered Sugar
Add in the powdered sugar gradually and beat until thoroughly combined. The mixture should be thick but manageable.
Step 4: Press into Pan
Press the peanut butter mixture evenly into the prepared sheet pan. Aim for about a 1/2 thickness for even shaping.
Step 5: Chill the Mixture
Place the sheet pan in the freezer for about 15 minutes. This helps firm up the mixture, making it easier to cut out shapes.
Step 6: Cut Shapes
Lift the chilled peanut butter mixture from the sheet pan onto a hard surface. Use cookie cutters to cut out bunny and/or egg shapes from the mixture.
Step 7: Freeze Cutouts
Place the cut shapes onto a sheet of parchment paper and return them to the freezer while you prepare the chocolate coating.
Step 8: Melt Chocolate
In heatproof bowls, place chocolate chips with shortening (if using both milk and white chocolate). Heat in 30-second increments, stirring between each blast until mostly melted.
Step 9: Dip Peanut Butter Shapes
Remove one or two chilled peanut butter bunnies/eggs from the freezer at a time. Use a fork to dip into melted chocolate fully coating each side before allowing excess chocolate to drip off.
Step 10: Let Chocolate Harden
Continue dipping remaining bunnies and eggs in batches. Allow each dipped shape to set on parchment paper until hardened completely.
Step 11: Drizzle Dark Chocolate
Heat dark chocolate chips with shortening in bursts until melted. Transfer to a piping bag or small ziploc bag, snip a tiny hole, and drizzle over bunnies and eggs for added decoration.
Step 12: Final Set
Allow the drizzled chocolate to set for about one minute before serving or storing your delightful creations!
Enjoy your homemade Peanut Butter Chocolate Eggs (and Bunnies)!
How to Serve Peanut Butter Chocolate Eggs (and Bunnies)
Peanut Butter Chocolate Eggs (and Bunnies) are a delightful treat perfect for any occasion. Whether you’re celebrating a holiday or just indulging in a sweet craving, here are some fun serving suggestions.
At Easter Gatherings
- Present these delightful eggs and bunnies on a festive platter to impress your guests.
- Pair them with colorful Easter grass for an eye-catching display.
As Party Favors
- Wrap individual servings in clear cellophane bags tied with ribbon.
- These make great party favors for kids’ birthday parties or holiday celebrations.
With Ice Cream
- Serve alongside a scoop of vanilla or chocolate ice cream for an indulgent dessert.
- Drizzle some hot fudge or caramel over the top for extra sweetness.
In Dessert Boxes
- Include them in dessert boxes filled with assorted treats like cookies and brownies.
- This makes a perfect gift for friends and family on special occasions.
With Coffee or Tea
- Enjoy these treats with a cup of coffee or tea for a cozy afternoon snack.
- The rich flavors of peanut butter and chocolate complement hot beverages beautifully.
How to Perfect Peanut Butter Chocolate Eggs (and Bunnies)
To ensure your Peanut Butter Chocolate Eggs (and Bunnies) turn out perfectly, consider these helpful tips.
- Choose quality chocolate: Use high-quality chocolate chips for the best flavor and smoothness when melting.
- Keep ingredients at room temperature: Let butter and peanut butter come to room temperature before mixing for a smoother consistency.
- Chill properly: Make sure to chill the peanut butter mixture thoroughly before cutting shapes to maintain their form during dipping.
- Work in small batches: Dip only a few eggs or bunnies at a time to prevent them from getting too soft while working.
- Drizzle creatively: Use different types of chocolate for drizzling on top to enhance both flavor and visual appeal.
- Store correctly: Keep the finished treats in an airtight container at room temperature to maintain their freshness.
Best Side Dishes for Peanut Butter Chocolate Eggs (and Bunnies)
Peanut Butter Chocolate Eggs (and Bunnies) can be wonderfully complemented by several side dishes. Here are some great options that pair well.
- Fresh Fruit Salad: A mix of seasonal fruits adds brightness and balances the richness of the eggs.
- Chocolate Dipped Strawberries: Continue the chocolate theme with strawberries dipped in chocolate, providing a fresh contrast.
- Mini Cheesecakes: These creamy desserts offer a delightful texture change and sweet flavor that pairs well with peanut butter.
- Brownies: Rich, fudgy brownies enhance the chocolate aspect, making for an indulgent dessert table.
- Ice Cream Sundaes: Create sundae bars where guests can add their toppings, creating fun combinations alongside the eggs.
- Cookies: Offer a variety of cookies like sugar cookies or oatmeal raisin to round out your dessert spread.
Common Mistakes to Avoid
Making Peanut Butter Chocolate Eggs (and Bunnies) can be a delightful experience, but there are some common pitfalls to watch out for.
- Not measuring ingredients accurately – Precision is key in baking. Use measuring cups and spoons to ensure you have the right amounts for the best flavor and texture.
- Skipping the chilling step – Chilling the peanut butter mixture is essential. It helps firm up the filling, making it easier to cut into shapes. Don’t rush this part!
- Using too much heat when melting chocolate – Overheating chocolate can ruin its texture. Melt it slowly in short increments to keep it smooth and workable.
- Not using enough shortening – Shortening helps achieve a silky chocolate coating. If you skip it, your chocolate may harden too quickly or not coat properly.
- Cutting shapes too thick – If the peanut butter layers are too thick, they may not hold together well once dipped in chocolate. Aim for about 1/2 inch for best results.
Storage & Reheating Instructions
Refrigerator Storage
- Store Peanut Butter Chocolate Eggs (and Bunnies) in an airtight container.
- They will last up to one week in the refrigerator.
Freezing Peanut Butter Chocolate Eggs (and Bunnies)
- Freeze them in a single layer on parchment paper before transferring to an airtight container.
- They can be stored in the freezer for up to three months.
Reheating Peanut Butter Chocolate Eggs (and Bunnies)
- Oven – Preheat to 350°F (175°C). Place on a baking sheet for about 5-10 minutes until warmed through.
- Microwave – Heat on low power for 10-15 seconds at a time until warm, being careful not to melt the chocolate.
- Stovetop – Use a double boiler method over low heat, stirring gently until warmed through.
Frequently Asked Questions
Here are some common questions about making Peanut Butter Chocolate Eggs (and Bunnies).
How can I customize my Peanut Butter Chocolate Eggs (and Bunnies)?
You can add ingredients like chopped nuts or different flavored extracts to the peanut butter filling for unique twists!
Can I use dark chocolate instead of milk?
Yes! You can substitute dark chocolate chips if you prefer a richer flavor for your Peanut Butter Chocolate Eggs (and Bunnies).
How do I prevent my chocolate from seizing?
Ensure no water comes into contact with your chocolate while melting. Water will cause it to clump and seize.
What’s the best way to decorate these eggs and bunnies?
Consider drizzling extra melted chocolate on top or adding colorful sprinkles after dipping them in chocolate for fun designs!
Final Thoughts
Peanut Butter Chocolate Eggs (and Bunnies) are not only delicious but also versatile. You can customize them with various fillings and toppings. This recipe is perfect for special occasions or just a sweet treat at home. Give it a try, and enjoy these delightful bites!

Peanut Butter Chocolate Eggs (and Bunnies)
- Total Time: 40 minutes
- Yield: Approximately 24 servings 1x
Description
Satisfy your sweet cravings with these Peanut Butter Chocolate Eggs (and Bunnies), a delightful treat that combines creamy peanut butter filling coated in rich milk chocolate. Perfect for holidays like Easter or any time you want a nostalgic snack, these homemade candies are easy to make and fun to customize. With simple ingredients and straightforward steps, even novice bakers can create these irresistible confections. Their playful shapes add an extra touch of joy, making them ideal for sharing at gatherings or as thoughtful gifts.
Ingredients
- 1/2 cup salted butter (melted and cooled)
- 2 cups creamy peanut butter
- 1/4 cup granulated sugar
- 1 tablespoon vanilla extract
- 4 cups powdered sugar
- 3 cups milk or white chocolate chips (or a combination)
- 2 tablespoons shortening (for melting chocolate)
- 1/2 cup dark or semi-sweet chocolate chips
Instructions
- Line a jelly roll pan with parchment paper.
- Beat melted butter, peanut butter, sugar, and vanilla until smooth.
- Gradually mix in powdered sugar until combined.
- Press the mixture into the pan evenly, about 1/2 inch thick.
- Freeze for 15 minutes, then cut out shapes using cookie cutters.
- Freeze the shapes again while melting the chocolate in a heatproof bowl.
- Dip each shape in melted chocolate and let them set on parchment paper.
- Drizzle with melted dark chocolate for decoration.
- Prep Time: 30 minutes
- Cook Time: 10 minutes
- Category: Dessert
- Method: Baking
- Cuisine: American
Nutrition
- Serving Size: 1 serving
- Calories: 190
- Sugar: 18g
- Sodium: 110mg
- Fat: 10g
- Saturated Fat: 4g
- Unsaturated Fat: 5g
- Trans Fat: 0g
- Carbohydrates: 23g
- Fiber: 1g
- Protein: 3g
- Cholesterol: 10mg